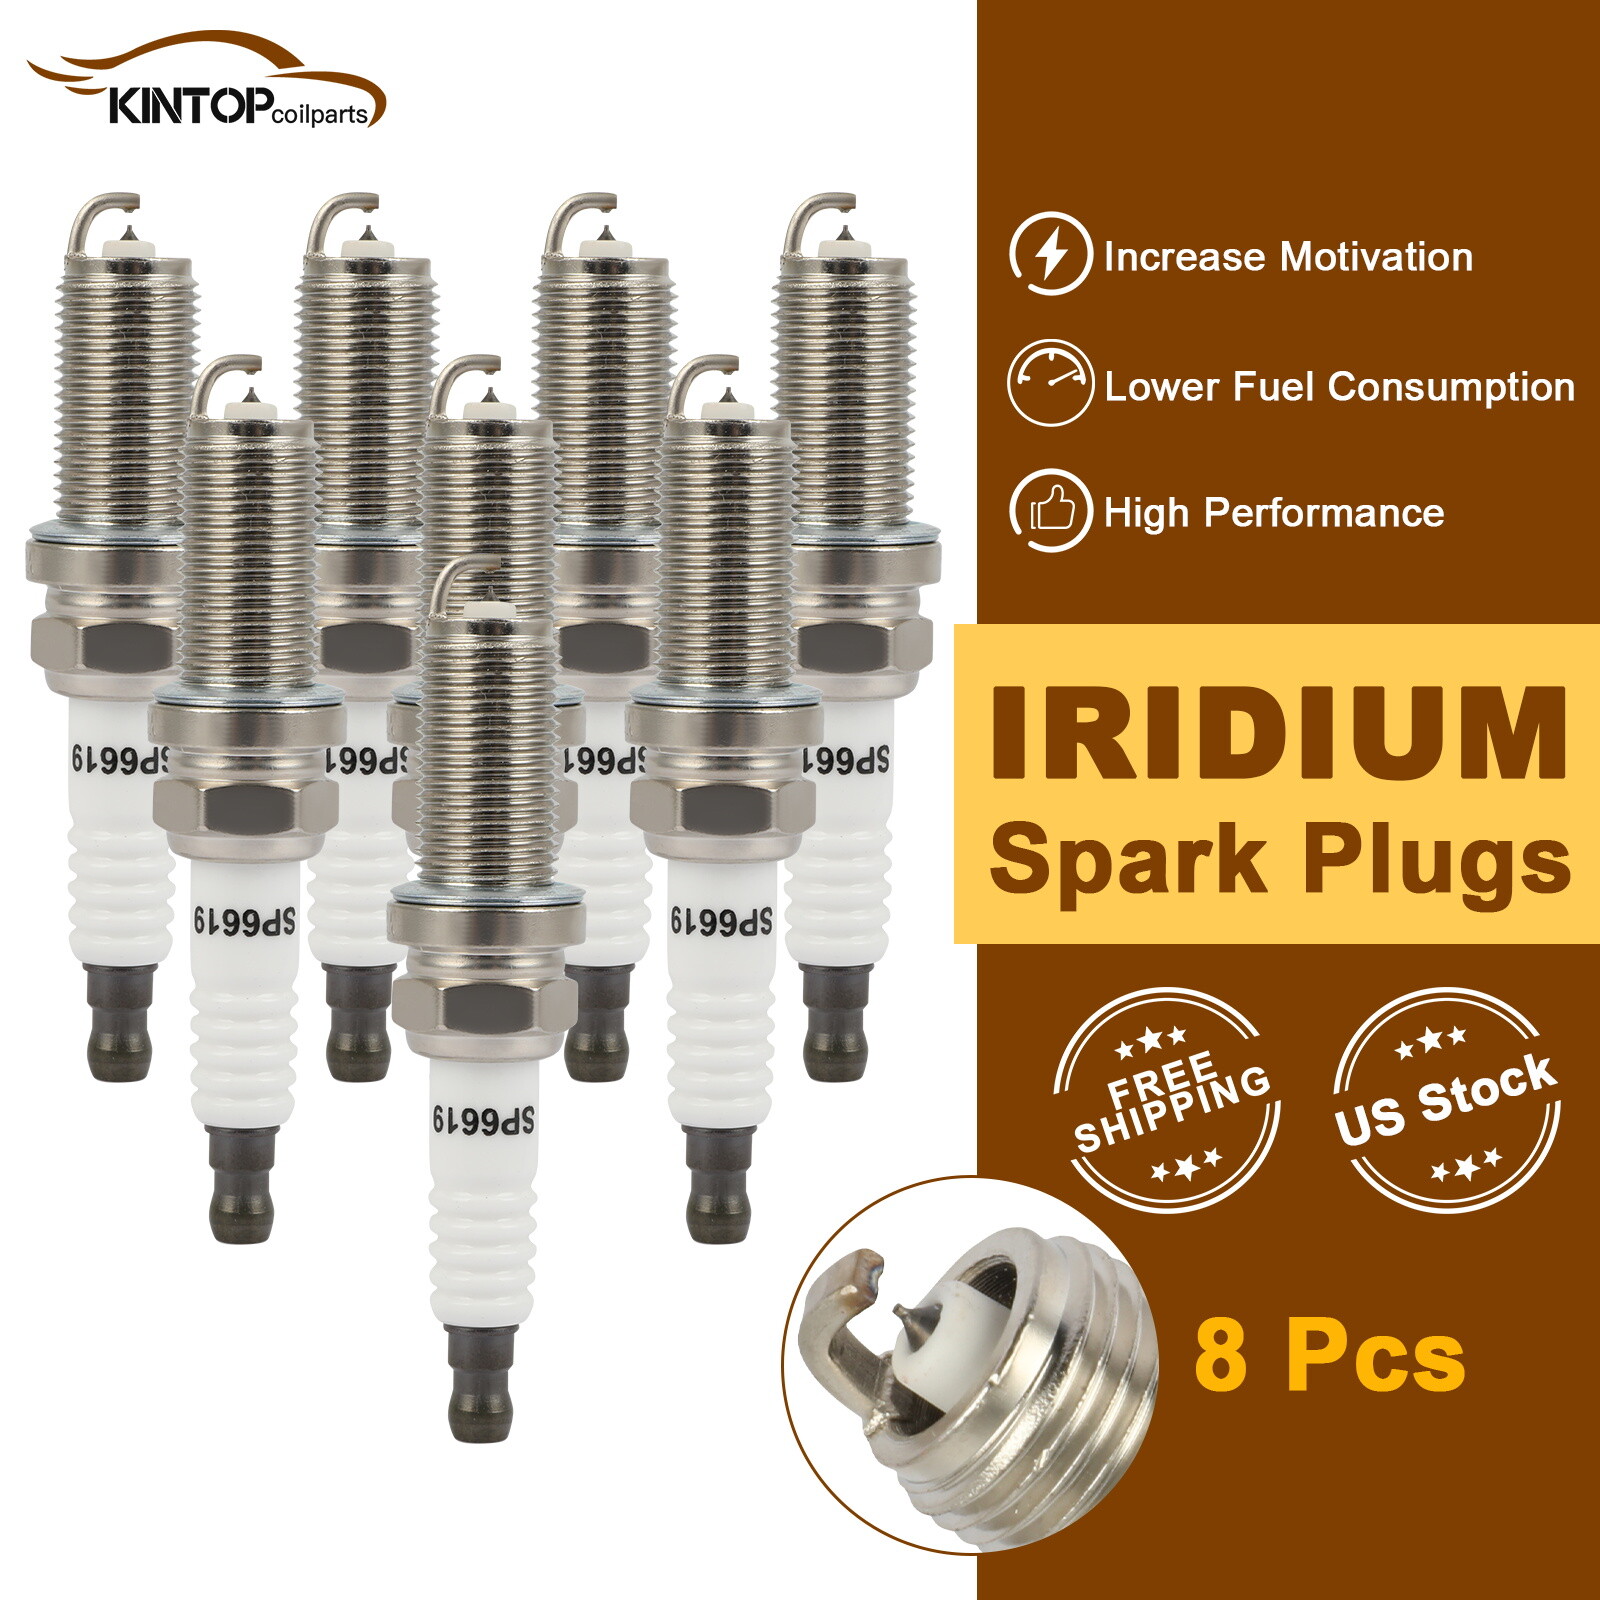
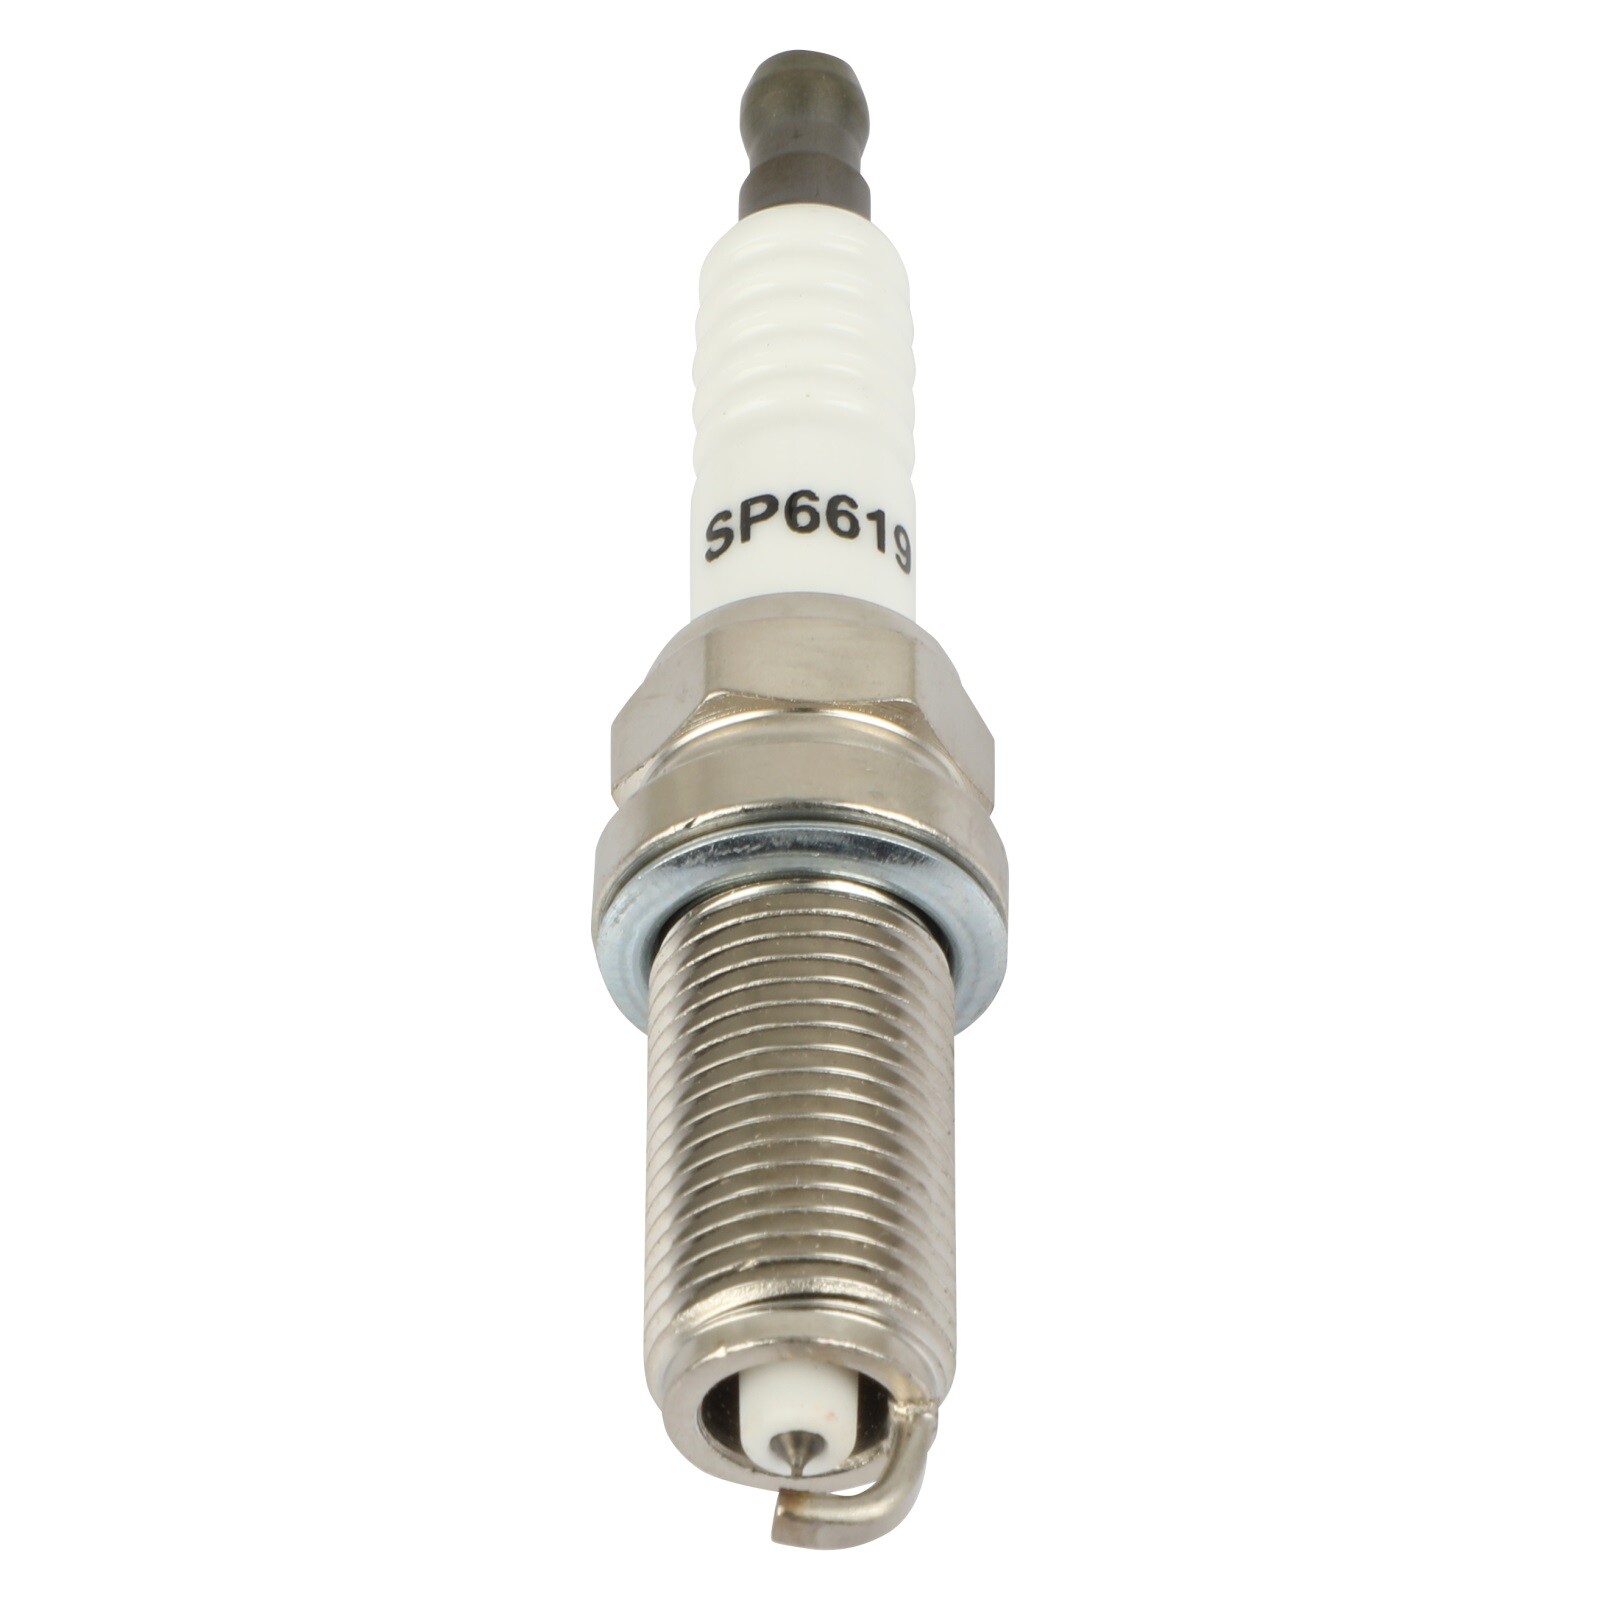
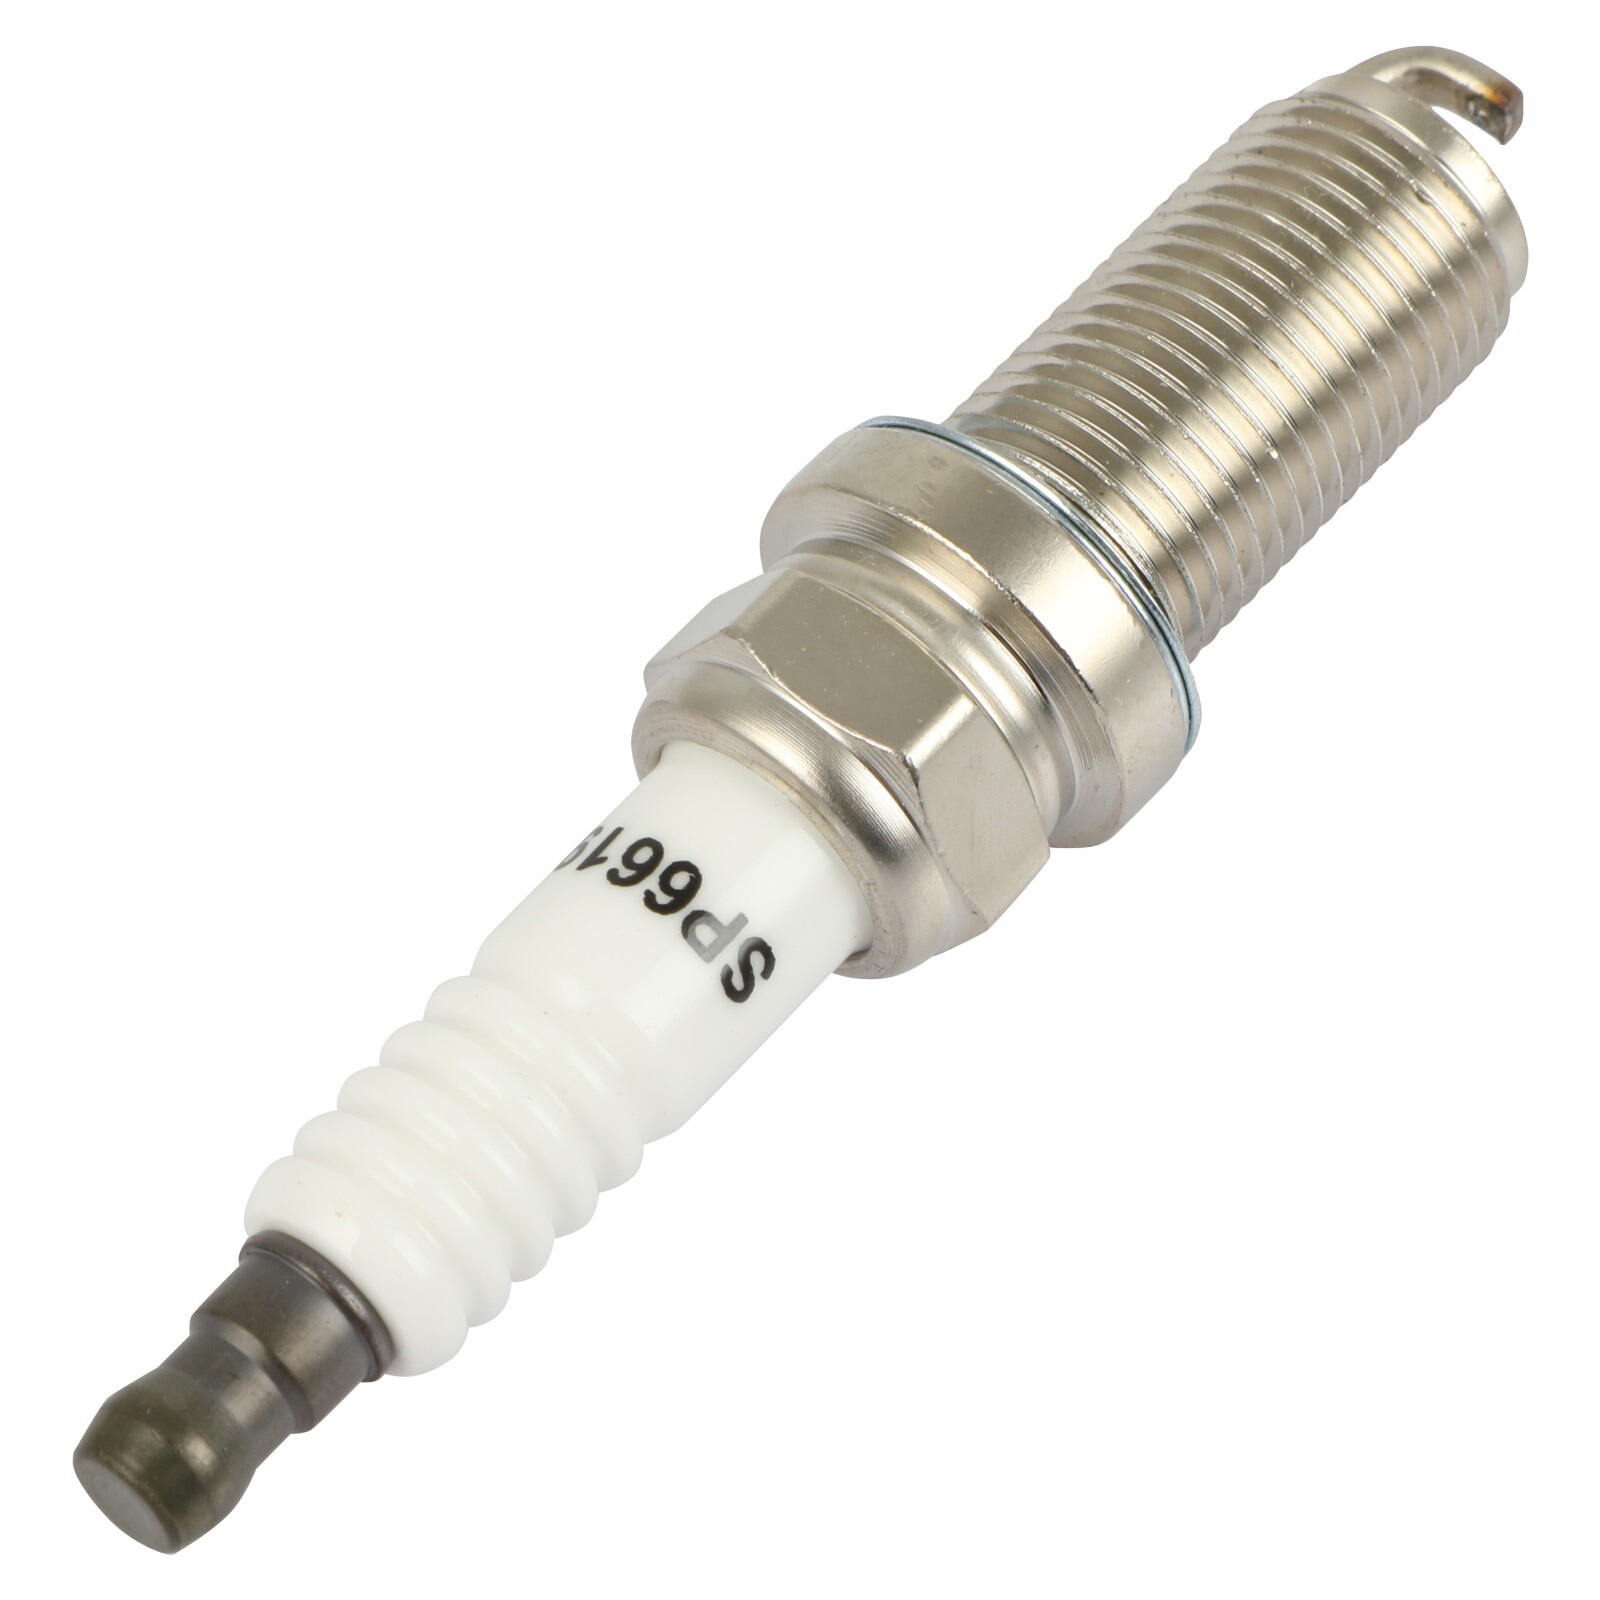
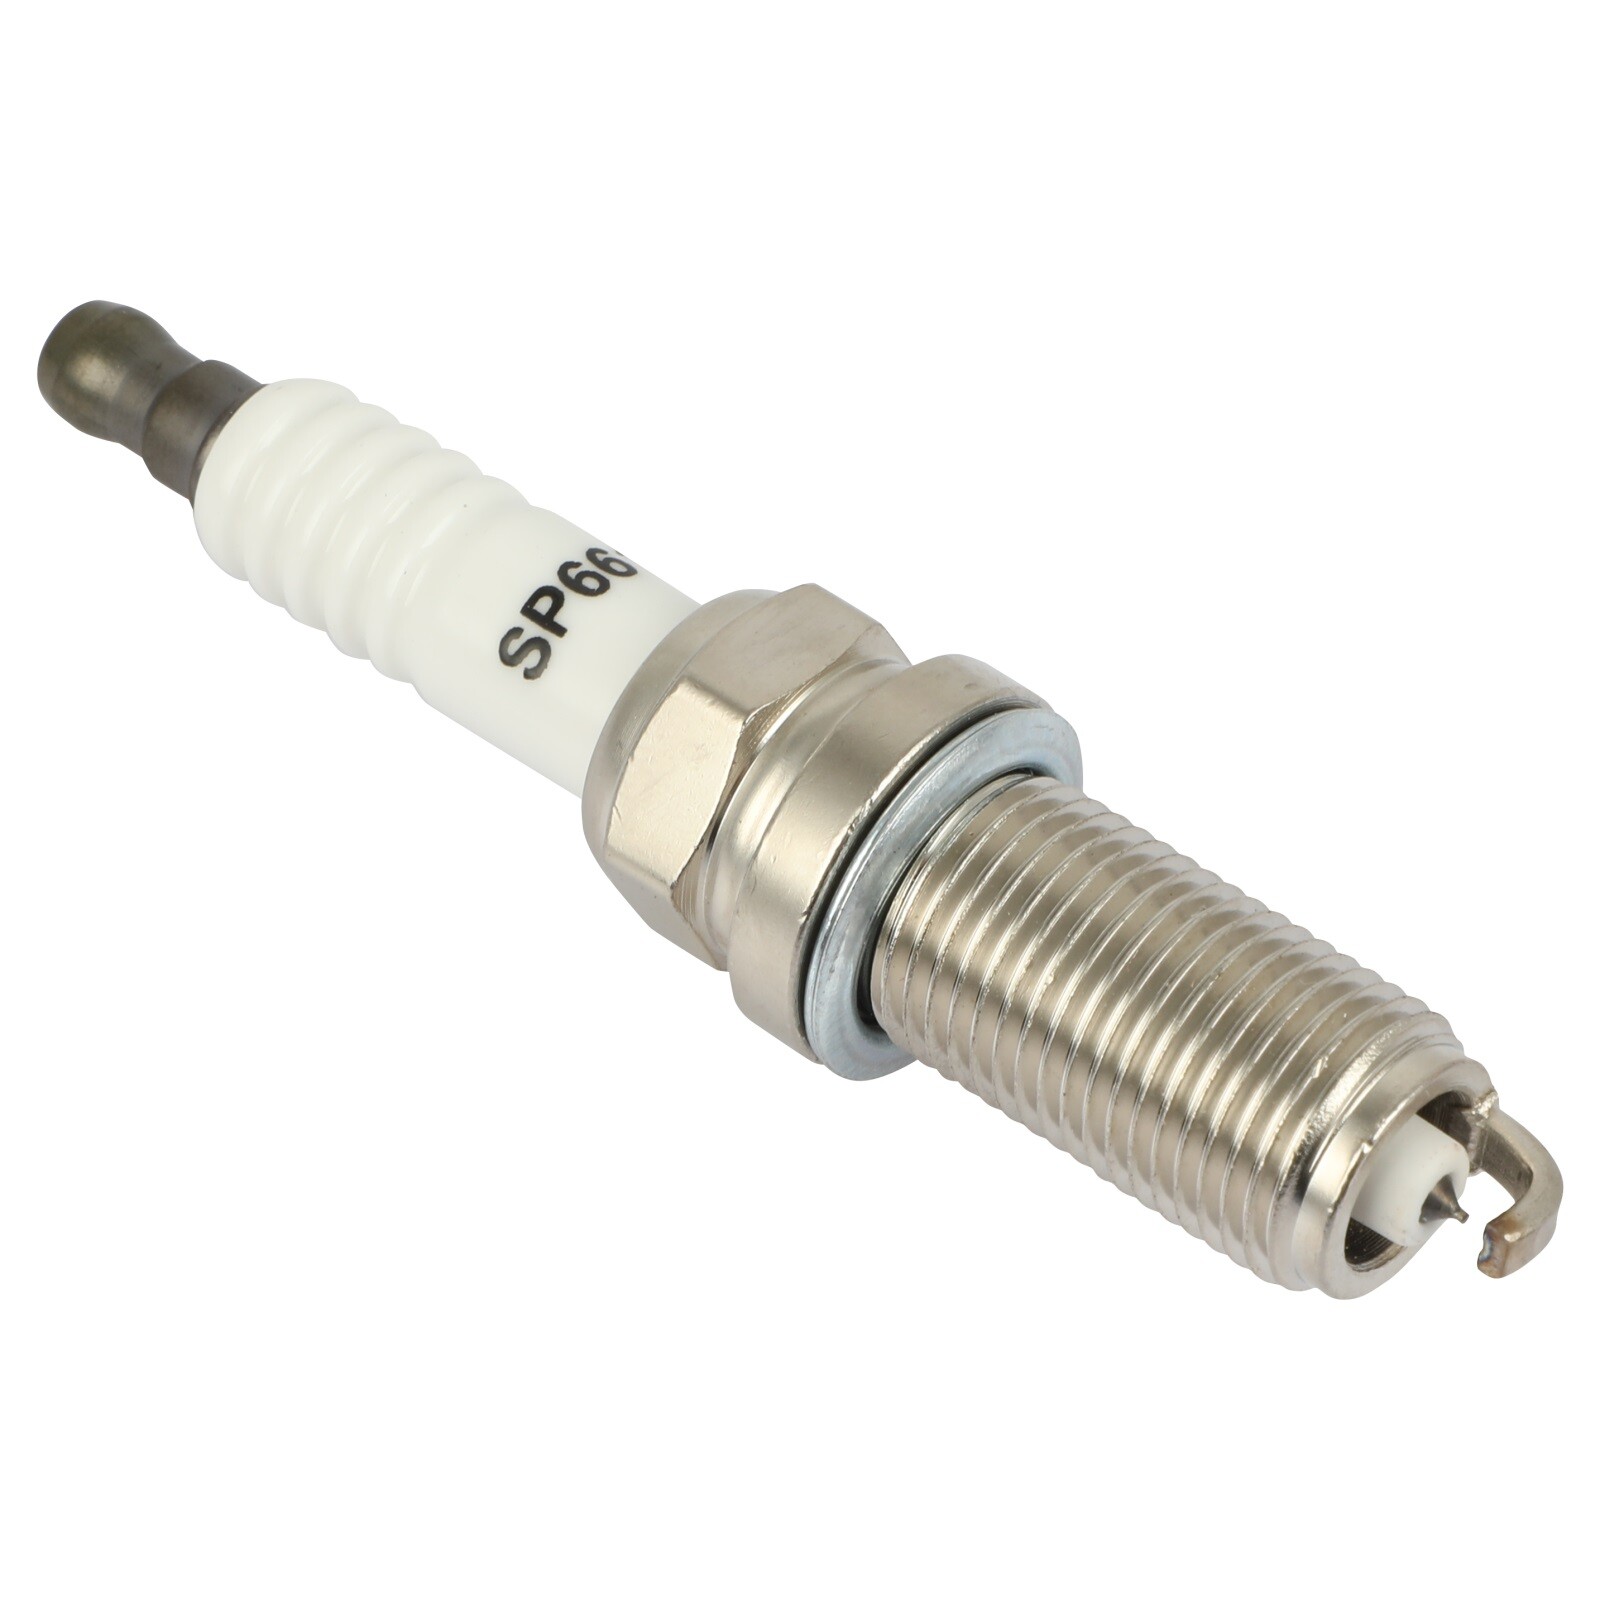
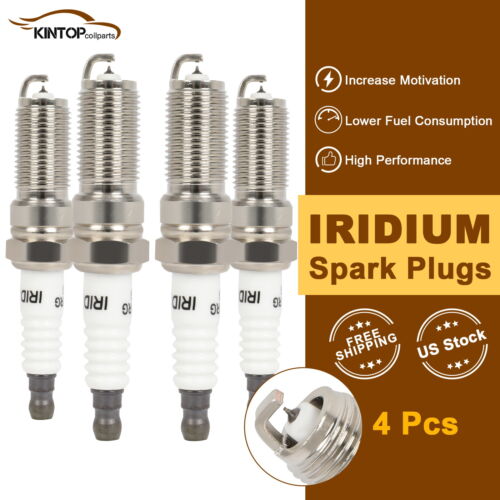
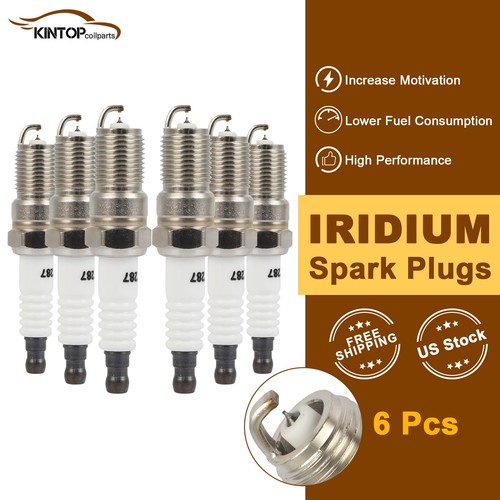
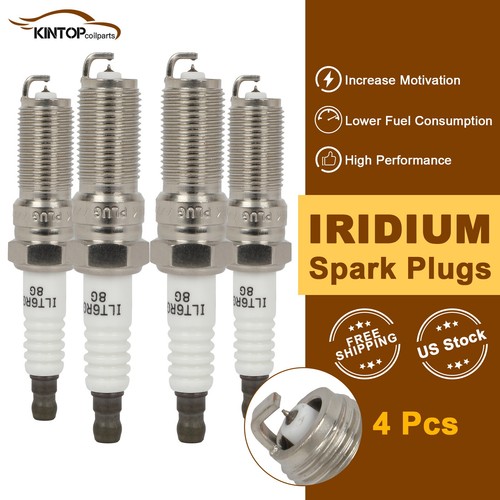
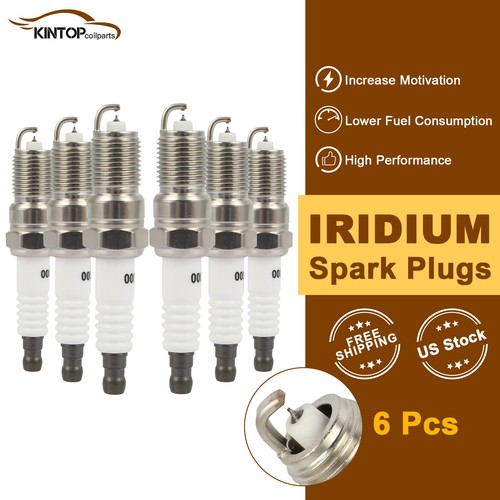
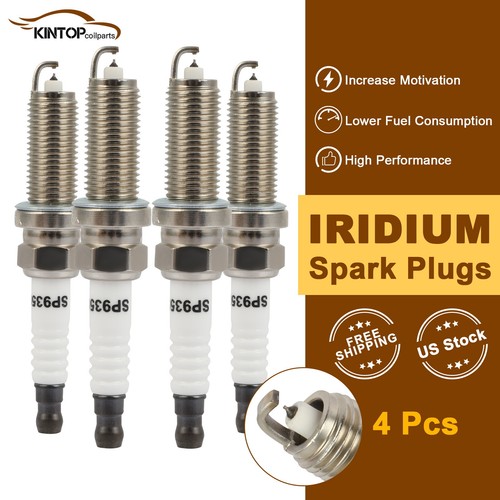
kintop_coilparts 8x Iridium & Platinum Spark Plugs For Toyota Tundra 5.7L 2007-2020
kintop_coilparts 8x Iridium & Platinum Spark Plugs For Toyota Tundra 5.7L 2007-2020


kintop_coilparts 8x Iridium & Platinum Spark Plugs For Toyota Tundra 5.7L 2007-2020
|
|
|
||||||
|
|
|
|
|
|||
|
|
|
|
|
|||
8x Iridium & Platinum Spark Plugs For Toyota Tundra 5.7L 2007-2020
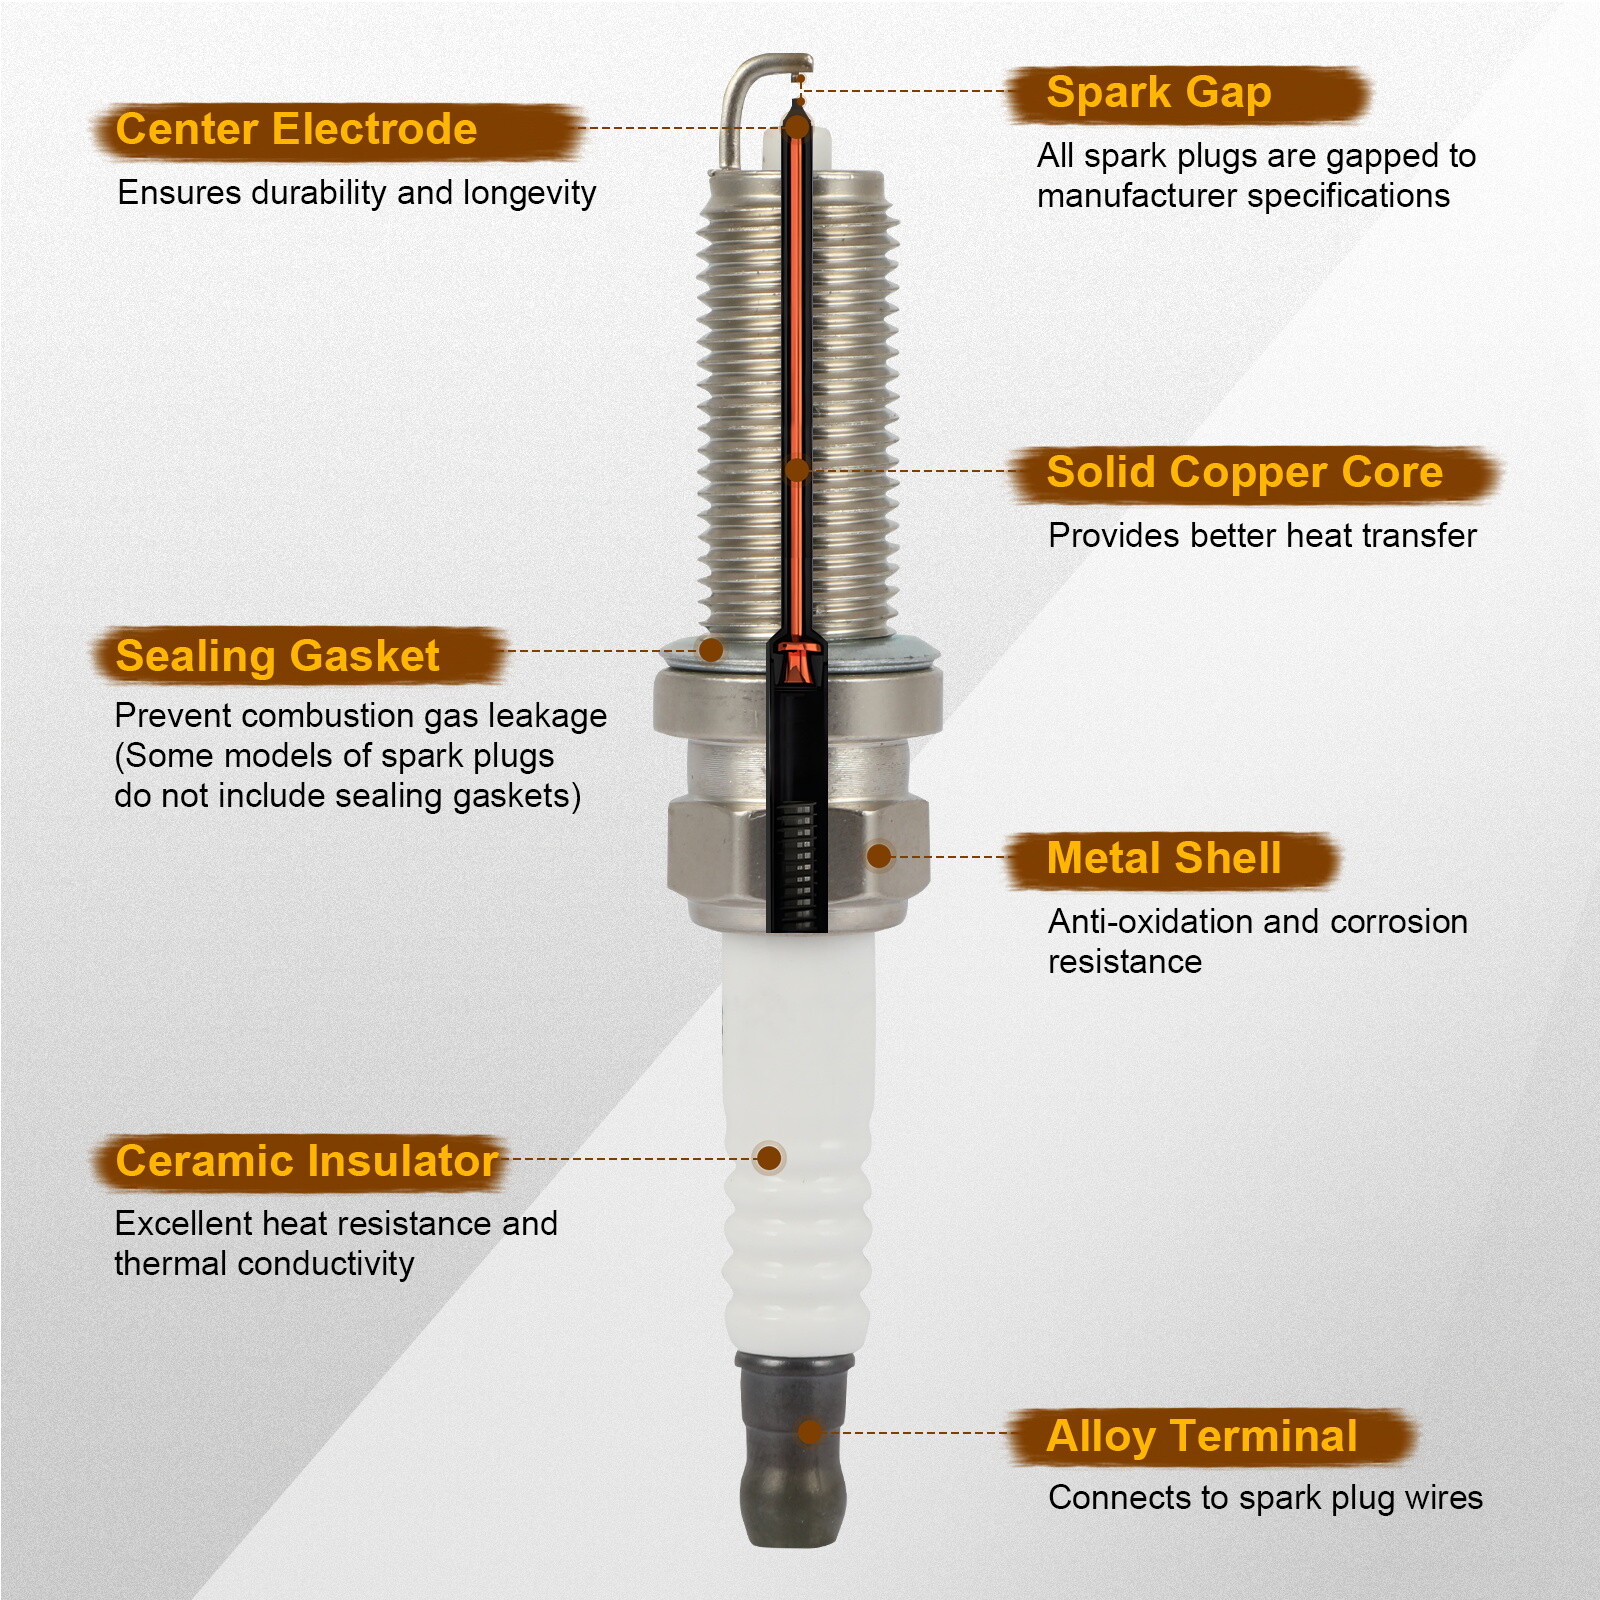
Benefits Of Using Iridium Spark Plugs
1. Extended Lifespan
Iridium plugs have the longest lifespan compared to a standard spark plug (copper core plug) or platinum plug. An iridium spark plug can last up to 100,000 miles, depending on your vehicle and driving conditions.
2. Enhanced Durability
Iridium is much harder and stronger than platinum, making it more durable to withstand the high voltage coming through the spark plug wire.
Iridium spark plug parts are also corrosion-resistant. So, the extreme conditions inside the combustion chamber can’t easily wear out their insulator tip, spark plug threads, center electrode, and the ground electrode.
Corroded spark plug threads can cause a spark plug to get stuck in a cylinder head, making replacement very difficult. In worst-case scenarios, the cylinder head is damaged and needs replacement too.
3. Better Ignition Experience
The smaller iridium center electrode of the plug offers a stronger and more concentrated spark, allowing quicker combustion. These plugs have superior ignitability and require less voltage from the ignition coil, leading to fewer misfires.
You’ll also experience less lag when you press down on the pedal and fewer delays in the initial engine startup. This is especially beneficial with the cold-cranking amps of your battery during winter.
4. Improved Fuel Economy
Iridium spark plugs offer improved ignition, allowing the fuel to burn more efficiently inside the combustion chamber. As a result, you get better fuel efficiency (10-20% for gasoline engines.)
5. More Engine Power
The technology of iridium plugs can improve the performance of modern engines during challenging driving conditions. You experience stable idling and a more controlled driving experience, especially in cars with automatic transmissions.
Failure Signs and Symptoms
If you’re not sure when to replace your spark plugs, look out for these signs of failure:
- Slow acceleration
- Poor fuel economy
- Rough idling
- Refusing to start or hard starting
- Misfiring
How to Change Spark Plugs
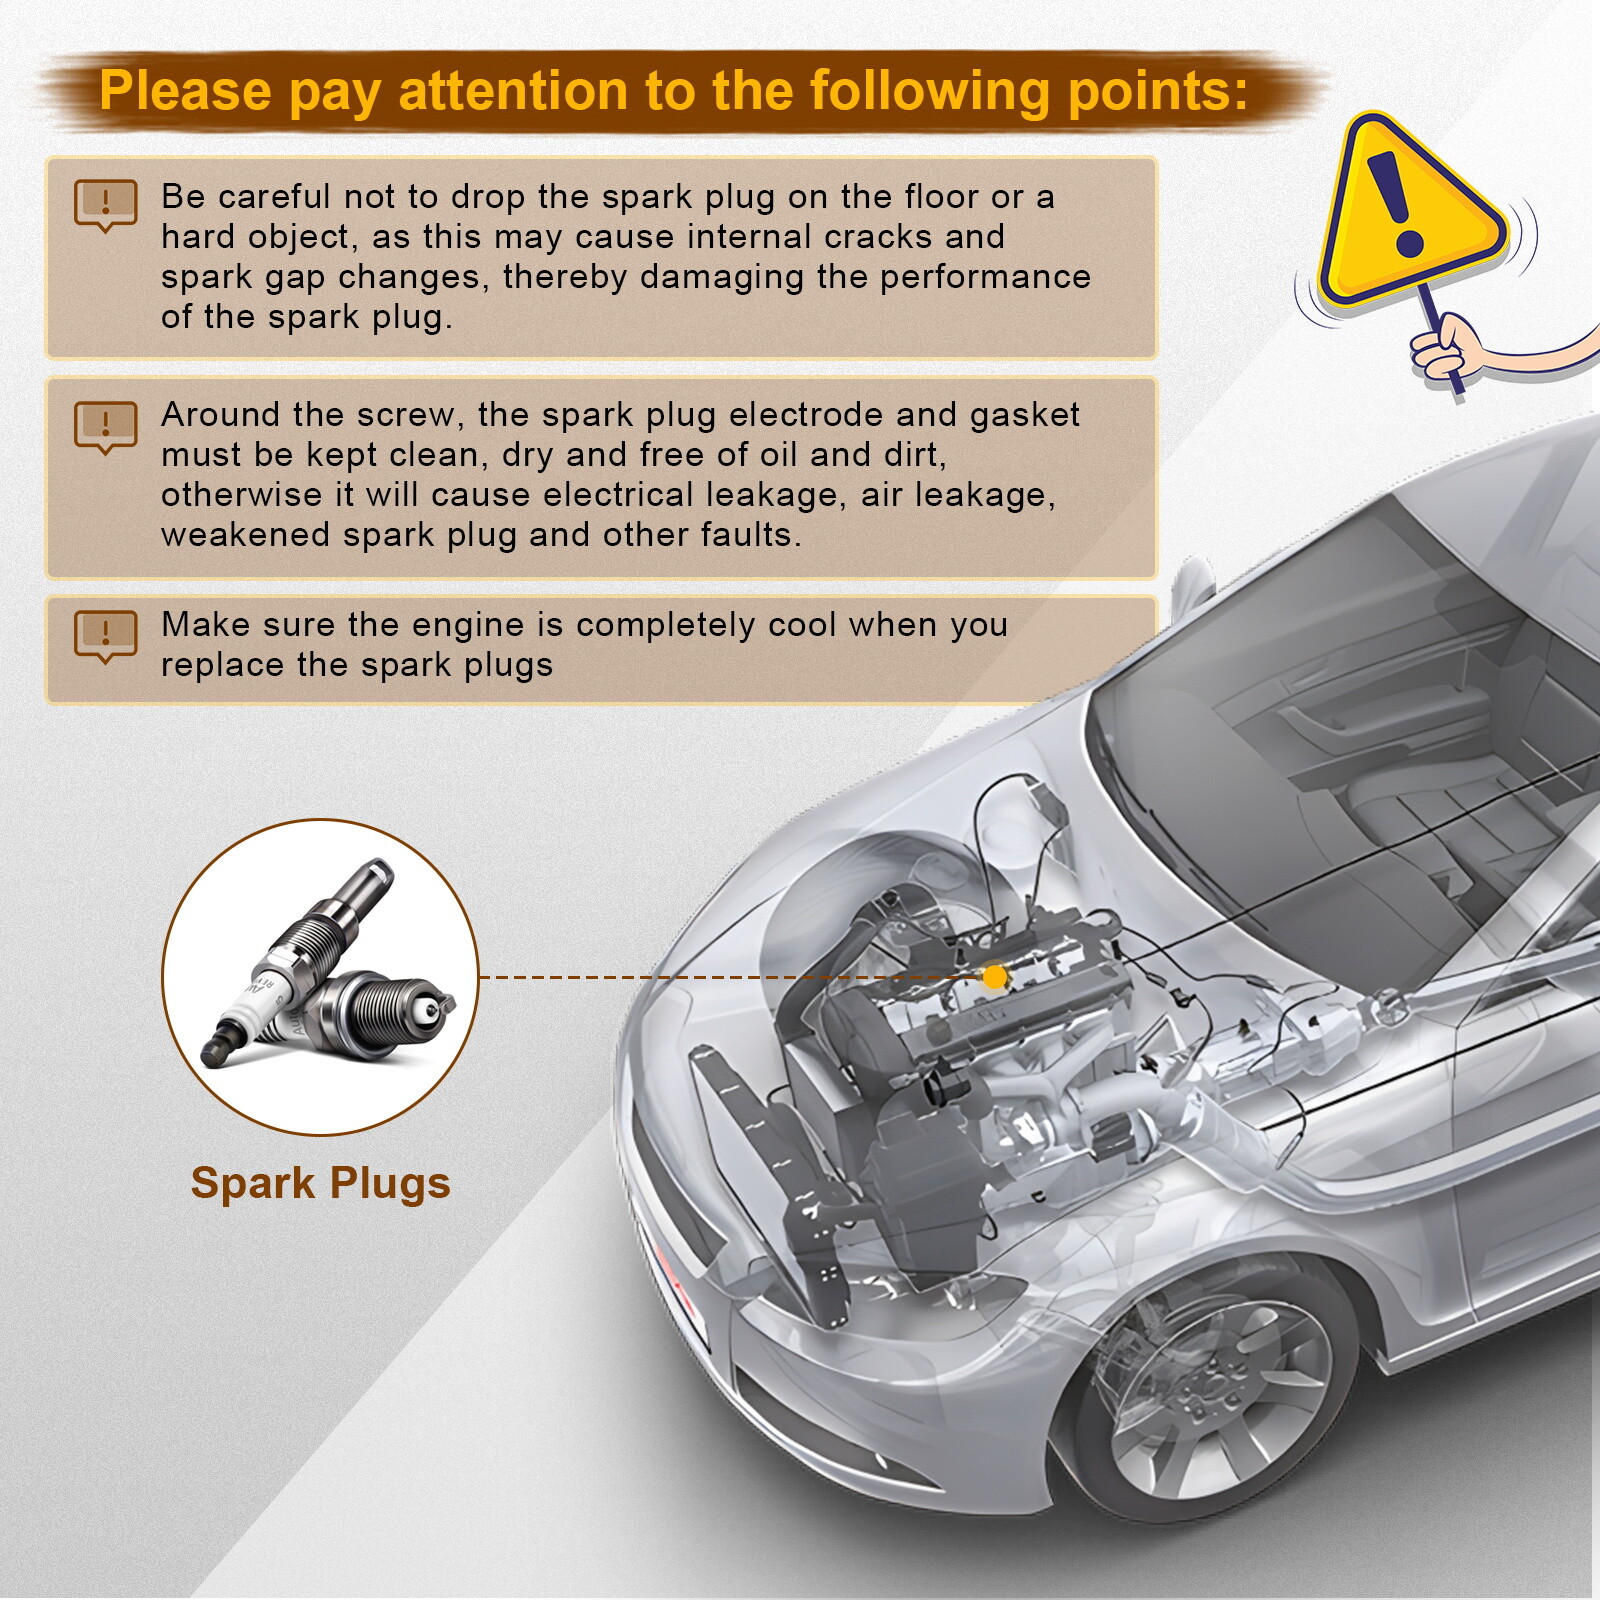
1. Safety First
Park your vehicle on a flat, dry surface and ensure the engine is cool. Clean the engine area of any dirt and debris to prevent anything from falling into the engine cylinder during spark plug replacement. Additionally, you may want to disconnect the battery (negative post only). Check the vehicle repair guide or other resources to ensure no damage will occur if the battery is disconnected for any length of time or if any modules or other items would need to be reprogrammed. Ensure the positive and negative terminals do not become crossed with a foreign object such a hand ratchet and cause a dangerous short circuit.
2. Remove the Spark Plug Wire
First, remove any interference items. If your vehicle requires removal of the upper intake plenum, a new gasket will be needed. After gaining access, you will likely find the rubber spark plug wire end and inside metal terminal somewhat difficult to remove from the spark plug. You must be careful to avoid damaging the rubber boot or tearing the wire terminal away from the plug wire end. If you discover the plug wire boot is ‘stuck’ to the spark plug try using spark plug wire pliers to aid in removal. The boot may need to be twisted back and forth to break the bond from the spark plug. Again, be careful. The metal terminal that connects to the spark plug inside the boot must be removed simultaneously with the boot to avoid damage. If damage to the boot or wire occurs, don’t feel bad. In many instances, even a professional is unable to remove them without damage occurring. If damage does occur, the wire(s) must be replaced. Re-installing a damaged boot or wire will cause a misfire and possible damage to other ignition components. If the spark plug wires are five to seven years old or have 100K+ miles of use, replacement is highly recommended. A new plug wireset will ensure the newly installed spark plugs will receive all the necessary firepower from the ignition coil(s).
3. Rrmove the Coil on Plug(COP)
COP designed coils attach directly to the spark plug end and use a long rubber insulator boot. Start the removal process by disconnecting the electrical connector from the ignition coil. Press down or pull up on the locking tab to make the connector release so it can be disconnected. A small screwdriver may be needed to help depress the locking tab. Once the connector is off, remove the hold down bolt and carefully twist the coil about a quarter turn or so back and forth until the ‘bond’ is broken. Then it should pull straight up and out. Use caution! There is always a risk of damage to the COP boot. COP coils and their insulator boots are made of plastic and rubber that protect and insulate the high voltage conducting materials inside. Damage will cause the high voltage to leak (short) to ground causing a misfire and possible damage to other ignition components. If the boots are damaged they must be replaced. Just like spark plug wires, if they are five to seven years old or have 100K+ miles of use, replacement is highly recommended. Check the COP boots for signs of engine oil or engine anti-freeze contamination. Oil puddled in the spark plug well hole is usually caused by a valve cover tube seal and/or leaking O-ring. The appearance of coolant in the plug well can be caused by a leaking heater or by-pass hose or even the intake manifold gasket. These leaks should be repaired first, especially if severe, to prevent damage to the new components.
4. Unscrew the Spark Plug
Be sure the engine is cooled off. Use a spark plug socket to remove the spark plugs. Avoid thread damage by following these suggested steps. On COP applications remove debris by blowing air down into the spark plug well hole. Even the tiniest of particles can build up in the threads of the spark plug during removal and cause damage to the cylinder head threads. If this occurs, sometimes a spark plug thread restorer tool may be used to do just that, restore damaged threads in the cylinder head. Next, loosen/turn the spark plug about a half a turn counter-clockwise and blast a small shot of penetrant fluid to the base/ thread area of the spark plug. Allow a few minutes to soak. On some engines, the manufacture may provide additional removal steps. Check the repair guide. Take note it you feel considerable resistance while turning the spark plug counter-clockwise. You may need an additional small amount of penetrant and soaking time. If you encounter resistance, turn the spark plug clockwise and carefully work it back and forth. If the plug just won’t co-operate, you should probably stop and seek a professional’s help. Damaged cylinder head threads can often be expensive to repair, depending on your vehicle.
5. Put in the New Spark Plugs
Before installing the new spark plugs, ensure each plug part number matches the part number and box description. Inspect each new spark plug for damage. Ensure the threads are clean and straight, the electrode and tip are intact, and the insulator for the plug wire or COP boot is not cracked or chipped.
6. Re-install the Spark Plug wires or Ignition Coils (COP)
Apply a small amount of plug wire grease to the plug wire boot (or COP boot) and re-install each plug wire or ignition coil. Be sure and connect the plug wires to the appropriate spark plug for each engine cylinder (refer to a firing order diagram if necessary). Re-install the coil hold down bolt(s). Re-attach the electrical connector(s). Re-install all other components removed to gain access. Be sure and gather up all tools and the engine is free and clear to start. Remember to re-connect the battery if it was disconnected at the beginning.
7. Start up the Engine
Starting the engine after the spark plug replacement is a good way to validate your work.
| Item Specifics | |
|---|---|
| Brand | kintop_coilparts |
| Type | Spark Plug |
| Manufacturer Part Number | KT134283TOP1 |
| Manufacturer Warranty | 2 Years |
| OE/OEM Part Number | 6619 |
| Material | Iridium |
| Center Electrode Tip Material | Iridium |
| Ground Electrode Tip Material | Platinum |
| Gap Style | J Gap |
| Pre-Gap Size | 0.043 in |
| Configuration | Standard |
| Hex Size | 16 mm |
| Insulator Height | 50.50 mm |
| Manufacturer Heat Range | 6 |
| Reach | 26.5 mm |
| Thread Diameter | 14 mm |
| Resistor Type | Yes |
| Resistance | 5000 ohms |
| Washer Included | Yes |
| Seat Type | Flat |
| Interchange Part Number | LFR6AIX11, 1208, ILZFR6D11, 1483, LFR6CGP, 94122 |
| Superseded Part Number | LFR6AHXS, 7787, LFR6C11, 5987, PLZFR6A11S |
| Universal Fitment | No |
| Performance Part | No |
| Vintage Car Part | No |
| Package Type | Box |
| Package included | 8x Iridium Spark Plugs |
| Make | Toyota |
| Model | Tundra |
| Year | 2007-2020 |
| Engine | 5.7L |
Payment
We can accept Credit card, Debit card, Apple Pay, Google Pay, visa, or master card, and so on. Thank you.
Additional shipping fee may be charged for buyers from Puerto Rico, Hawaii, Alaska, Guam, and the U.S. military address of the United States or other remote area (zone 8-10).
Shipping
All domestic orders will be shipped via USPS, UPS or Fedex from our US warehouse and usually arrives to your door in about 2-7 business days.
Returns
All of our brand new items come with a 60-Days money-back guarantee.
Contact Us
Any question, please contact us by e-mail on working days.
Warning
Please check the compatibility carefully before purchasing. If you are not sure about the model, please contact us in time.
Terms & Contact Payment Policy Shipping Policy Return Policy FAQ About Us |
8x Iridium & Platinum Spark Plugs For Toyota Tundra 5.7L 2007-2020
Benefits Of Using Iridium Spark Plugs
1. Extended Lifespan Iridium plugs have the longest lifespan compared to a standard spark plug (copper core plug) or platinum plug. An iridium spark plug can last up to 100,000 miles, depending on your vehicle and driving conditions.
2. Enhanced Durability Iridium is much harder and stronger than platinum, making it more durable to withstand the high voltage coming through the spark plug wire.
Iridium spark plug parts are also corrosion-resistant. So, the extreme conditions inside the combustion chamber can’t easily wear out their insulator tip, spark plug threads, center electrode, and the ground electrode.
Corroded spark plug threads can cause a spark plug to get stuck in a cylinder head, making replacement very difficult. In worst-case scenarios, the cylinder head is damaged and needs replacement too.
3. Better Ignition Experience The smaller iridium center electrode of the plug offers a stronger and more concentrated spark, allowing quicker combustion. These plugs have superior ignitability and require less voltage from the ignition coil, leading to fewer misfires.
You’ll also experience less lag when you press down on the pedal and fewer delays in the initial engine startup. This is especially beneficial with the cold-cranking amps of your battery during winter.
4. Improved Fuel Economy Iridium spark plugs offer improved ignition, allowing the fuel to burn more efficiently inside the combustion chamber. As a result, you get better fuel efficiency (10-20% for gasoline engines.)
5. More Engine Power The technology of iridium plugs can improve the performance of modern engines during challenging driving conditions. You experience stable idling and a more controlled driving experience, especially in cars with automatic transmissions.
Failure Signs and Symptoms
If you’re not sure when to replace your spark plugs, look out for these signs of failure:
How to Change Spark Plugs
1. Safety First Park your vehicle on a flat, dry surface and ensure the engine is cool. Clean the engine area of any dirt and debris to prevent anything from falling into the engine cylinder during spark plug replacement. Additionally, you may want to disconnect the battery (negative post only). Check the vehicle repair guide or other resources to ensure no damage will occur if the battery is disconnected for any length of time or if any modules or other items would need to be reprogrammed. Ensure the positive and negative terminals do not become crossed with a foreign object such a hand ratchet and cause a dangerous short circuit.
2. Remove the Spark Plug Wire First, remove any interference items. If your vehicle requires removal of the upper intake plenum, a new gasket will be needed. After gaining access, you will likely find the rubber spark plug wire end and inside metal terminal somewhat difficult to remove from the spark plug. You must be careful to avoid damaging the rubber boot or tearing the wire terminal away from the plug wire end. If you discover the plug wire boot is ‘stuck’ to the spark plug try using spark plug wire pliers to aid in removal. The boot may need to be twisted back and forth to break the bond from the spark plug. Again, be careful. The metal terminal that connects to the spark plug inside the boot must be removed simultaneously with the boot to avoid damage. If damage to the boot or wire occurs, don’t feel bad. In many instances, even a professional is unable to remove them without damage occurring. If damage does occur, the wire(s) must be replaced. Re-installing a damaged boot or wire will cause a misfire and possible damage to other ignition components. If the spark plug wires are five to seven years old or have 100K+ miles of use, replacement is highly recommended. A new plug wireset will ensure the newly installed spark plugs will receive all the necessary firepower from the ignition coil(s).
3. Rrmove the Coil on Plug(COP) COP designed coils attach directly to the spark plug end and use a long rubber insulator boot. Start the removal process by disconnecting the electrical connector from the ignition coil. Press down or pull up on the locking tab to make the connector release so it can be disconnected. A small screwdriver may be needed to help depress the locking tab. Once the connector is off, remove the hold down bolt and carefully twist the coil about a quarter turn or so back and forth until the ‘bond’ is broken. Then it should pull straight up and out. Use caution! There is always a risk of damage to the COP boot. COP coils and their insulator boots are made of plastic and rubber that protect and insulate the high voltage conducting materials inside. Damage will cause the high voltage to leak (short) to ground causing a misfire and possible damage to other ignition components. If the boots are damaged they must be replaced. Just like spark plug wires, if they are five to seven years old or have 100K+ miles of use, replacement is highly recommended. Check the COP boots for signs of engine oil or engine anti-freeze contamination. Oil puddled in the spark plug well hole is usually caused by a valve cover tube seal and/or leaking O-ring. The appearance of coolant in the plug well can be caused by a leaking heater or by-pass hose or even the intake manifold gasket. These leaks should be repaired first, especially if severe, to prevent damage to the new components.
4. Unscrew the Spark Plug Be sure the engine is cooled off. Use a spark plug socket to remove the spark plugs. Avoid thread damage by following these suggested steps. On COP applications remove debris by blowing air down into the spark plug well hole. Even the tiniest of particles can build up in the threads of the spark plug during removal and cause damage to the cylinder head threads. If this occurs, sometimes a spark plug thread restorer tool may be used to do just that, restore damaged threads in the cylinder head. Next, loosen/turn the spark plug about a half a turn counter-clockwise and blast a small shot of penetrant fluid to the base/ thread area of the spark plug. Allow a few minutes to soak. On some engines, the manufacture may provide additional removal steps. Check the repair guide. Take note it you feel considerable resistance while turning the spark plug counter-clockwise. You may need an additional small amount of penetrant and soaking time. If you encounter resistance, turn the spark plug clockwise and carefully work it back and forth. If the plug just won’t co-operate, you should probably stop and seek a professional’s help. Damaged cylinder head threads can often be expensive to repair, depending on your vehicle.
5. Put in the New Spark Plugs Before installing the new spark plugs, ensure each plug part number matches the part number and box description. Inspect each new spark plug for damage. Ensure the threads are clean and straight, the electrode and tip are intact, and the insulator for the plug wire or COP boot is not cracked or chipped.
6. Re-install the Spark Plug wires or Ignition Coils (COP) Apply a small amount of plug wire grease to the plug wire boot (or COP boot) and re-install each plug wire or ignition coil. Be sure and connect the plug wires to the appropriate spark plug for each engine cylinder (refer to a firing order diagram if necessary). Re-install the coil hold down bolt(s). Re-attach the electrical connector(s). Re-install all other components removed to gain access. Be sure and gather up all tools and the engine is free and clear to start. Remember to re-connect the battery if it was disconnected at the beginning.
7. Start up the Engine Starting the engine after the spark plug replacement is a good way to validate your work.
We can accept Credit card, Debit card, Apple Pay, Google Pay, visa, or master card, and so on. Thank you. All domestic orders will be shipped via USPS, UPS or Fedex from our US warehouse and usually arrives to your door in about 2-7 business days. All of our brand new items come with a 60-Days money-back guarantee. Any question, please contact us by e-mail on working days. Please check the compatibility carefully before purchasing. If you are not sure about the model, please contact us in time. All rights reserved. |
||||||||||||||||||||||||||||||||||||||||||||||||||||||||||||||||||||||||||||||||||
| Brand: | kintop_coilparts |
|---|---|
| Isin: | IMVSIFRX2QLQ |
Out of Stock
In Stock
Backordered
Out of Stock


IBspot Buyer Protection
Shop confidently on IBspot, receive your item as described or your money back for eligible orders. Learn Program Terms
GUARANTEED SAFE CHECKOUT
-

MONEY BACK GUARANTEE
30 days money back guarantee, no additional fee charged.
-

EXCELLENT SUPPORT
We provide 24/7 online customer support via email.
-

Fast Shipping
One week domestic shipping. Global delivery to the US in 2 weeks.

|
|
||||||

|

|
|
|
|||
|
|
|
|
|||

8x Iridium & Platinum Spark Plugs For Toyota Tundra 5.7L 2007-2020
Benefits Of Using Iridium Spark Plugs
1. Extended Lifespan
Iridium plugs have the longest lifespan compared to a standard spark plug (copper core plug) or platinum plug. An iridium spark plug can last up to 100,000 miles, depending on your vehicle and driving conditions.
2. Enhanced Durability
Iridium is much harder and stronger than platinum, making it more durable to withstand the high voltage coming through the spark plug wire.
Iridium spark plug parts are also corrosion-resistant. So, the extreme conditions inside the combustion chamber can’t easily wear out their insulator tip, spark plug threads, center electrode, and the ground electrode.
Corroded spark plug threads can cause a spark plug to get stuck in a cylinder head, making replacement very difficult. In worst-case scenarios, the cylinder head is damaged and needs replacement too.
3. Better Ignition Experience
The smaller iridium center electrode of the plug offers a stronger and more concentrated spark, allowing quicker combustion. These plugs have superior ignitability and require less voltage from the ignition coil, leading to fewer misfires.
You’ll also experience less lag when you press down on the pedal and fewer delays in the initial engine startup. This is especially beneficial with the cold-cranking amps of your battery during winter.
4. Improved Fuel Economy
Iridium spark plugs offer improved ignition, allowing the fuel to burn more efficiently inside the combustion chamber. As a result, you get better fuel efficiency (10-20% for gasoline engines.)
5. More Engine Power
The technology of iridium plugs can improve the performance of modern engines during challenging driving conditions. You experience stable idling and a more controlled driving experience, especially in cars with automatic transmissions.
Failure Signs and Symptoms
If you’re not sure when to replace your spark plugs, look out for these signs of failure:
- Slow acceleration
- Poor fuel economy
- Rough idling
- Refusing to start or hard starting
- Misfiring
How to Change Spark Plugs
1. Safety First
Park your vehicle on a flat, dry surface and ensure the engine is cool. Clean the engine area of any dirt and debris to prevent anything from falling into the engine cylinder during spark plug replacement. Additionally, you may want to disconnect the battery (negative post only). Check the vehicle repair guide or other resources to ensure no damage will occur if the battery is disconnected for any length of time or if any modules or other items would need to be reprogrammed. Ensure the positive and negative terminals do not become crossed with a foreign object such a hand ratchet and cause a dangerous short circuit.
2. Remove the Spark Plug Wire
First, remove any interference items. If your vehicle requires removal of the upper intake plenum, a new gasket will be needed. After gaining access, you will likely find the rubber spark plug wire end and inside metal terminal somewhat difficult to remove from the spark plug. You must be careful to avoid damaging the rubber boot or tearing the wire terminal away from the plug wire end. If you discover the plug wire boot is ‘stuck’ to the spark plug try using spark plug wire pliers to aid in removal. The boot may need to be twisted back and forth to break the bond from the spark plug. Again, be careful. The metal terminal that connects to the spark plug inside the boot must be removed simultaneously with the boot to avoid damage. If damage to the boot or wire occurs, don’t feel bad. In many instances, even a professional is unable to remove them without damage occurring. If damage does occur, the wire(s) must be replaced. Re-installing a damaged boot or wire will cause a misfire and possible damage to other ignition components. If the spark plug wires are five to seven years old or have 100K+ miles of use, replacement is highly recommended. A new plug wireset will ensure the newly installed spark plugs will receive all the necessary firepower from the ignition coil(s).
3. Rrmove the Coil on Plug(COP)
COP designed coils attach directly to the spark plug end and use a long rubber insulator boot. Start the removal process by disconnecting the electrical connector from the ignition coil. Press down or pull up on the locking tab to make the connector release so it can be disconnected. A small screwdriver may be needed to help depress the locking tab. Once the connector is off, remove the hold down bolt and carefully twist the coil about a quarter turn or so back and forth until the ‘bond’ is broken. Then it should pull straight up and out. Use caution! There is always a risk of damage to the COP boot. COP coils and their insulator boots are made of plastic and rubber that protect and insulate the high voltage conducting materials inside. Damage will cause the high voltage to leak (short) to ground causing a misfire and possible damage to other ignition components. If the boots are damaged they must be replaced. Just like spark plug wires, if they are five to seven years old or have 100K+ miles of use, replacement is highly recommended. Check the COP boots for signs of engine oil or engine anti-freeze contamination. Oil puddled in the spark plug well hole is usually caused by a valve cover tube seal and/or leaking O-ring. The appearance of coolant in the plug well can be caused by a leaking heater or by-pass hose or even the intake manifold gasket. These leaks should be repaired first, especially if severe, to prevent damage to the new components.
4. Unscrew the Spark Plug
Be sure the engine is cooled off. Use a spark plug socket to remove the spark plugs. Avoid thread damage by following these suggested steps. On COP applications remove debris by blowing air down into the spark plug well hole. Even the tiniest of particles can build up in the threads of the spark plug during removal and cause damage to the cylinder head threads. If this occurs, sometimes a spark plug thread restorer tool may be used to do just that, restore damaged threads in the cylinder head. Next, loosen/turn the spark plug about a half a turn counter-clockwise and blast a small shot of penetrant fluid to the base/ thread area of the spark plug. Allow a few minutes to soak. On some engines, the manufacture may provide additional removal steps. Check the repair guide. Take note it you feel considerable resistance while turning the spark plug counter-clockwise. You may need an additional small amount of penetrant and soaking time. If you encounter resistance, turn the spark plug clockwise and carefully work it back and forth. If the plug just won’t co-operate, you should probably stop and seek a professional’s help. Damaged cylinder head threads can often be expensive to repair, depending on your vehicle.
5. Put in the New Spark Plugs
Before installing the new spark plugs, ensure each plug part number matches the part number and box description. Inspect each new spark plug for damage. Ensure the threads are clean and straight, the electrode and tip are intact, and the insulator for the plug wire or COP boot is not cracked or chipped.
6. Re-install the Spark Plug wires or Ignition Coils (COP)
Apply a small amount of plug wire grease to the plug wire boot (or COP boot) and re-install each plug wire or ignition coil. Be sure and connect the plug wires to the appropriate spark plug for each engine cylinder (refer to a firing order diagram if necessary). Re-install the coil hold down bolt(s). Re-attach the electrical connector(s). Re-install all other components removed to gain access. Be sure and gather up all tools and the engine is free and clear to start. Remember to re-connect the battery if it was disconnected at the beginning.
7. Start up the Engine
Starting the engine after the spark plug replacement is a good way to validate your work.
| Item Specifics | |
|---|---|
| Brand | kintop_coilparts |
| Type | Spark Plug |
| Manufacturer Part Number | KT134283TOP1 |
| Manufacturer Warranty | 2 Years |
| OE/OEM Part Number | 6619 |
| Material | Iridium |
| Center Electrode Tip Material | Iridium |
| Ground Electrode Tip Material | Platinum |
| Gap Style | J Gap |
| Pre-Gap Size | 0.043 in |
| Configuration | Standard |
| Hex Size | 16 mm |
| Insulator Height | 50.50 mm |
| Manufacturer Heat Range | 6 |
| Reach | 26.5 mm |
| Thread Diameter | 14 mm |
| Resistor Type | Yes |
| Resistance | 5000 ohms |
| Washer Included | Yes |
| Seat Type | Flat |
| Interchange Part Number | LFR6AIX11, 1208, ILZFR6D11, 1483, LFR6CGP, 94122 |
| Superseded Part Number | LFR6AHXS, 7787, LFR6C11, 5987, PLZFR6A11S |
| Universal Fitment | No |
| Performance Part | No |
| Vintage Car Part | No |
| Package Type | Box |
| Package included | 8x Iridium Spark Plugs |
| Make | Toyota |
| Model | Tundra |
| Year | 2007-2020 |
| Engine | 5.7L |
Payment
We can accept Credit card, Debit card, Apple Pay, Google Pay, visa, or master card, and so on. Thank you.
Additional shipping fee may be charged for buyers from Puerto Rico, Hawaii, Alaska, Guam, and the U.S. military address of the United States or other remote area (zone 8-10).
Shipping
All domestic orders will be shipped via USPS, UPS or Fedex from our US warehouse and usually arrives to your door in about 2-7 business days.
Returns
All of our brand new items come with a 60-Days money-back guarantee.
Contact Us
Any question, please contact us by e-mail on working days.
Warning
Please check the compatibility carefully before purchasing. If you are not sure about the model, please contact us in time.
Best Sales
Newly Listed
Terms & Contact Payment Policy Shipping Policy Return Policy FAQ About Us |
8x Iridium & Platinum Spark Plugs For Toyota Tundra 5.7L 2007-2020
Benefits Of Using Iridium Spark Plugs
1. Extended Lifespan Iridium plugs have the longest lifespan compared to a standard spark plug (copper core plug) or platinum plug. An iridium spark plug can last up to 100,000 miles, depending on your vehicle and driving conditions.
2. Enhanced Durability Iridium is much harder and stronger than platinum, making it more durable to withstand the high voltage coming through the spark plug wire.
Iridium spark plug parts are also corrosion-resistant. So, the extreme conditions inside the combustion chamber can’t easily wear out their insulator tip, spark plug threads, center electrode, and the ground electrode.
Corroded spark plug threads can cause a spark plug to get stuck in a cylinder head, making replacement very difficult. In worst-case scenarios, the cylinder head is damaged and needs replacement too.
3. Better Ignition Experience The smaller iridium center electrode of the plug offers a stronger and more concentrated spark, allowing quicker combustion. These plugs have superior ignitability and require less voltage from the ignition coil, leading to fewer misfires.
You’ll also experience less lag when you press down on the pedal and fewer delays in the initial engine startup. This is especially beneficial with the cold-cranking amps of your battery during winter.
4. Improved Fuel Economy Iridium spark plugs offer improved ignition, allowing the fuel to burn more efficiently inside the combustion chamber. As a result, you get better fuel efficiency (10-20% for gasoline engines.)
5. More Engine Power The technology of iridium plugs can improve the performance of modern engines during challenging driving conditions. You experience stable idling and a more controlled driving experience, especially in cars with automatic transmissions.
Failure Signs and Symptoms
If you’re not sure when to replace your spark plugs, look out for these signs of failure:
How to Change Spark Plugs
1. Safety First Park your vehicle on a flat, dry surface and ensure the engine is cool. Clean the engine area of any dirt and debris to prevent anything from falling into the engine cylinder during spark plug replacement. Additionally, you may want to disconnect the battery (negative post only). Check the vehicle repair guide or other resources to ensure no damage will occur if the battery is disconnected for any length of time or if any modules or other items would need to be reprogrammed. Ensure the positive and negative terminals do not become crossed with a foreign object such a hand ratchet and cause a dangerous short circuit.
2. Remove the Spark Plug Wire First, remove any interference items. If your vehicle requires removal of the upper intake plenum, a new gasket will be needed. After gaining access, you will likely find the rubber spark plug wire end and inside metal terminal somewhat difficult to remove from the spark plug. You must be careful to avoid damaging the rubber boot or tearing the wire terminal away from the plug wire end. If you discover the plug wire boot is ‘stuck’ to the spark plug try using spark plug wire pliers to aid in removal. The boot may need to be twisted back and forth to break the bond from the spark plug. Again, be careful. The metal terminal that connects to the spark plug inside the boot must be removed simultaneously with the boot to avoid damage. If damage to the boot or wire occurs, don’t feel bad. In many instances, even a professional is unable to remove them without damage occurring. If damage does occur, the wire(s) must be replaced. Re-installing a damaged boot or wire will cause a misfire and possible damage to other ignition components. If the spark plug wires are five to seven years old or have 100K+ miles of use, replacement is highly recommended. A new plug wireset will ensure the newly installed spark plugs will receive all the necessary firepower from the ignition coil(s).
3. Rrmove the Coil on Plug(COP) COP designed coils attach directly to the spark plug end and use a long rubber insulator boot. Start the removal process by disconnecting the electrical connector from the ignition coil. Press down or pull up on the locking tab to make the connector release so it can be disconnected. A small screwdriver may be needed to help depress the locking tab. Once the connector is off, remove the hold down bolt and carefully twist the coil about a quarter turn or so back and forth until the ‘bond’ is broken. Then it should pull straight up and out. Use caution! There is always a risk of damage to the COP boot. COP coils and their insulator boots are made of plastic and rubber that protect and insulate the high voltage conducting materials inside. Damage will cause the high voltage to leak (short) to ground causing a misfire and possible damage to other ignition components. If the boots are damaged they must be replaced. Just like spark plug wires, if they are five to seven years old or have 100K+ miles of use, replacement is highly recommended. Check the COP boots for signs of engine oil or engine anti-freeze contamination. Oil puddled in the spark plug well hole is usually caused by a valve cover tube seal and/or leaking O-ring. The appearance of coolant in the plug well can be caused by a leaking heater or by-pass hose or even the intake manifold gasket. These leaks should be repaired first, especially if severe, to prevent damage to the new components.
4. Unscrew the Spark Plug Be sure the engine is cooled off. Use a spark plug socket to remove the spark plugs. Avoid thread damage by following these suggested steps. On COP applications remove debris by blowing air down into the spark plug well hole. Even the tiniest of particles can build up in the threads of the spark plug during removal and cause damage to the cylinder head threads. If this occurs, sometimes a spark plug thread restorer tool may be used to do just that, restore damaged threads in the cylinder head. Next, loosen/turn the spark plug about a half a turn counter-clockwise and blast a small shot of penetrant fluid to the base/ thread area of the spark plug. Allow a few minutes to soak. On some engines, the manufacture may provide additional removal steps. Check the repair guide. Take note it you feel considerable resistance while turning the spark plug counter-clockwise. You may need an additional small amount of penetrant and soaking time. If you encounter resistance, turn the spark plug clockwise and carefully work it back and forth. If the plug just won’t co-operate, you should probably stop and seek a professional’s help. Damaged cylinder head threads can often be expensive to repair, depending on your vehicle.
5. Put in the New Spark Plugs Before installing the new spark plugs, ensure each plug part number matches the part number and box description. Inspect each new spark plug for damage. Ensure the threads are clean and straight, the electrode and tip are intact, and the insulator for the plug wire or COP boot is not cracked or chipped.
6. Re-install the Spark Plug wires or Ignition Coils (COP) Apply a small amount of plug wire grease to the plug wire boot (or COP boot) and re-install each plug wire or ignition coil. Be sure and connect the plug wires to the appropriate spark plug for each engine cylinder (refer to a firing order diagram if necessary). Re-install the coil hold down bolt(s). Re-attach the electrical connector(s). Re-install all other components removed to gain access. Be sure and gather up all tools and the engine is free and clear to start. Remember to re-connect the battery if it was disconnected at the beginning.
7. Start up the Engine Starting the engine after the spark plug replacement is a good way to validate your work.
We can accept Credit card, Debit card, Apple Pay, Google Pay, visa, or master card, and so on. Thank you. All domestic orders will be shipped via USPS, UPS or Fedex from our US warehouse and usually arrives to your door in about 2-7 business days. All of our brand new items come with a 60-Days money-back guarantee. Any question, please contact us by e-mail on working days. Please check the compatibility carefully before purchasing. If you are not sure about the model, please contact us in time. All rights reserved. |
|||||||||||||||||||||||||||||||||||||||||||||||||||||||||||||||||||||||||||||||||||||||||||||||||||||||||||
- UPC: Does not apply
- Brand: kintop_coilparts
- Type: Spark Plug
- Manufacturer Part Number: KT134283TOP1
- Manufacturer Warranty: 2 Years
- OE/OEM Part Number: 6619
- Material: Iridium
- Center Electrode Tip Material: Iridium
- Ground Electrode Tip Material: Platinum
- Gap Style: J Gap
- Pre-Gap Size: 0.043 in
- Configuration: Standard
- Hex Size: 16 mm
- Insulator Height: 50.50 mm
- Manufacturer Heat Range: 6
- Reach: 26.5 mm
- Thread Diameter: 14 mm
- Resistor Type: Yes
- Resistance: 5000 ohms
- Washer Included: Yes
- Seat Type: Flat
- Interchange Part Number: LFR6AIX11, 1208, ILZFR6D11, 1483, LFR6CGP, 94122
- Superseded Part Number: LFR6AHXS, 7787, LFR6C11, 5987, PLZFR6A11S
- Universal Fitment: No
- Performance Part: No
- Vintage Part: No
- Package Type: Box
- Package included: 8x Iridium Spark Plugs
- Make: Toyota
- Model: Tundra
- Year: 2007-2020
- Engine: 5.7L
Processing Time
- We process and ship orders Monday through Friday, excluding holidays.
- Most orders are processed within 1–3 business days, depending on product availability.
- Processing time does not include delivery time, which varies based on your location and the product’s shipping origin.
Shipping Coverage
We currently ship to addresses within the United States only.
Products may ship from:
- Our U.S. warehouses, or
- Our international fulfillment centers (including Korea, Japan, China, Australia, Mexico, Canada, the United Kingdom, and the EU).
Each product page clearly displays the “Ships From” location before checkout.
Shipping Methods & Estimated Delivery
| Shipping Method | Estimated Delivery | Cost |
|---|---|---|
| Free Shipping (US) | 5–10 business days | Free, available on eligible items |
| Standard Shipping (US to US by Item) | 5–10 business days | $6.50 for the first item, $2.00 each additional |
| Standard Shipping (From US Warehouse by Weight) | 3–7 business days | Starts at $6.50, increasing by $2 for every additional 4 oz (0.25 lb) up to 1 lb, then by $4 for each additional pound beyond 1 lb. |
| Extended Delivery (Ships from Overseas Warehouse) | 10–15 business days | $14.50 for the first item, $2.00 each additional |
Shipping costs vary by product weight, quantity and origin. Exact rates and delivery estimates are displayed on each product page and confirmed during checkout.
Free Shipping
We offer free standard shipping on select products or during promotional periods. Availability of free shipping will be displayed on the product page and at checkout.
Carriers
We primarily use USPS and UPS for U.S. deliveries. Items shipped from international warehouses may be handled by partner carriers depending on the country of origin.
Import Duties & Taxes
All import duties and taxes for goods imported into the United States are included in the product price. There are no hidden fees or additional charges at checkout.
Tracking & Notifications
Every order is fully trackable. You will receive a tracking number via email once your order ships. If your order ships in multiple packages, each package will have its own tracking number. If you don’t receive a shipping confirmation immediately, your order is still being processed and will arrive within the estimated timeframe shown at checkout.
You can track your shipment anytime using the Track Your Order page on our website.
Order Changes & Cancellations
If you need to modify or cancel an order, please contact our customer support team as soon as possible. Orders can only be canceled before they ship. Once shipped, cancellations are not possible, but you may request a return after the item is delivered.
Contact: support@ibspot.com
Item Not Received
If your tracking number shows “Delivered” but you haven’t received your package:
- Check with your local USPS or UPS office.
- Confirm that the shipping address provided was correct.
- If the issue remains unresolved, contact support@ibspot.com for assistance.
Damaged or Lost Parcels
If your package arrives damaged or fails to arrive, please contact us immediately. For deliveries to P.O. boxes, ibspot is not responsible for damage caused by weather, temperature, or theft.
Customer Support
For any questions about shipping, tracking, or delivery, our customer support team is here to help.
Email: support@ibspot.com
We’re always happy to help.
Please read our policy carefully before making a purchase.
We aim to ensure every customer has a smooth and transparent experience with ibspot.com.
Order Cancellation Policy
Customers may request to cancel an order before it has been shipped.
Once the package has been shipped, cancellations are no longer possible; however, you may still request a return after receiving your order.
How to Request a Cancellation
You can contact us through:
- Email: support@ibspot.com
- Contact Form: Submit a request through our Contact Us page
Please submit your cancellation request as soon as possible after placing the order to allow us to process it before shipment.
Return Policy
We accept returns for most items within 30 days of delivery for a full refund.
To be eligible for a return:
- The item must be unused, in the same condition as received, and in its original packaging.
- A tracking number must be provided to confirm the return shipment.
Non-Returnable Items
Certain products cannot be returned, including:
- Perishable goods (for example, food, flowers, newspapers, magazines)
- Intimate or sanitary goods
- Hazardous materials or flammable liquids/gases
- Gift cards
- Downloadable software
- Some health and personal care items
Partial Refunds (If Applicable)
Partial refunds may be granted in specific situations, such as:
- Books with obvious signs of use
- Opened CDs, DVDs, software, or vinyl records
- Items not in their original condition, damaged, or missing parts not due to our error
- Items returned more than 30 days after delivery
How to Return an Item
To initiate a return, please contact us at support@ibspot.com with your order number and details about the product you wish to return.
Our team will provide you with return instructions and a prepaid return label.
Shipping Cost for Returns
Please contact us before returning any item.
We will provide a free return shipping label.
If a return is sent back without prior contact or without our provided label, we cannot be held responsible for return shipping costs.
For items valued over $75, we recommend using a trackable shipping service or purchasing shipping insurance.
We cannot guarantee that we will receive your returned item if shipped independently.
Refund Processing
Once your return is received and inspected:
- In-store returns are refunded to the original form of payment or issued as a gift card.
- Mail-in returns using our prepaid label are refunded to the original payment method within 3–5 business days after we receive your return.
Please allow:
- 5–7 business days for the return to reach our Returns Center.
- An additional 3–10 business days for your bank to post the refund to your account.
Damages, Issues & Claims
Please inspect your order immediately upon receipt.
If you receive a defective, damaged, or incorrect item, contact us right away at support@ibspot.com.
We’ll evaluate the issue promptly and make it right.
Product Claims
Before purchasing, please review product details carefully.
If there is a problem with your order upon arrival, visit our Support Center or contact us directly to arrange return shipping or replacement.
Exchanges
We do not process direct exchanges.
The fastest way to get what you need is to return the original item and place a new order once your return is accepted.
Return Address
IBSPOT Return Center
15 Sawmill Ln
Dover Plains, NY 12522
United States
Customer Support
Our support team is available 24/7 to assist with cancellations, returns, or general inquiries.
Email: support@ibspot.com
Contact Form: Contact Us page
Oops!
Sorry, it looks like some products are not available in selected quantity.